Create a new project or open an existing project.
Create a new cell.
Click on the ZIP Code button  .
.
Three steps are required to define a sampling frame by ZIP Code.
First, define the ZIP Code area.
Second, create a Coverage Report to review the coverage and incidence for the Area Code/Exchange combinations serving that ZIP Code area.
Third, apply a cutoff based on the coverage and incidence for the project.
Create a new project or open an existing project.
Create a new cell.
Click on the ZIP Code button .
-- or --
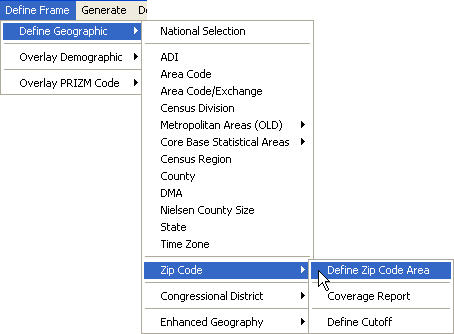
On the Define Frame menu, point to Define Geographic, then to Zip Code, then click Define Zip Code Area.
A ZIP Code dialog box opens.
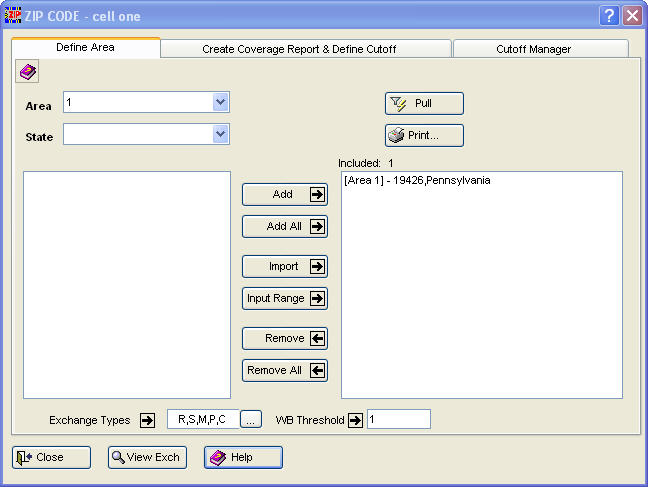
The Define Area tab is selected. The cell name is displayed in the title bar. Add ![]() ,Add All
,Add All  ,Import
  ,Input Range
  ,Remove
  , andRemove All
  are provided for convenience.
Define the cell's geography.
To select a ZIP Code and move it into the Included box
Select a number, 1 through 5, in the Area box. "Area" means Area Code/Exchange combinations. The numbers mean that 1 contains Area Code/Exchange combinations primary to that ZIP Code, 2 contains Area Code/Exchange combinations secondary to that ZIP Code, and so forth.
Select a state in the State box. This generates a list of states.
Do one of the following:
Click once on an item, then click Include  .
.
Click twice (double-click) on an item.
After a cell is defined, including the Exchange Types ![]() andWB (Working Bank)Threshold
andWB (Working Bank)Threshold ![]() , click Pull
, click Pull  to retrieve the corresponding exchanges.
A message displays the number of exchanges pulled that serve the defined geographic area.
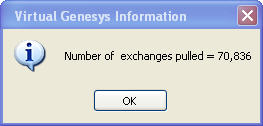
(Click OK  .)
.)
Click Close ![]() to close, click View Exch
to close, click View Exch  for a View Exchanges dialog box, or click Print
  to open a Geographic Definition Report for printing.
To define ZIP Code Areas by providing a range of ZIP Codes
Click Input Range . An Input Zip Codes dialog box opens.
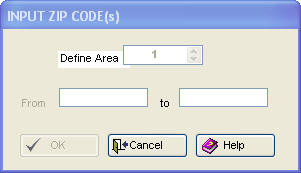
Type the beginning and end numbers of the ZIP Code range into the From and to boxes, respectively. Click OK .
To define the ZIP Code Area by importing a text file containing a list of ZIP Codes
Click Import . An Import ZIP Code dialog box opens.
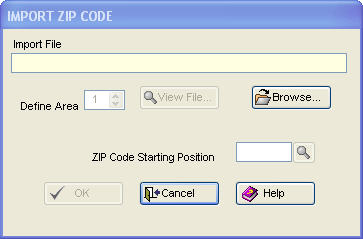
ClickBrowse  to locate the import file.
The ZIP Codes should begin at the same position in each line of the file. Type that position number into the ZIP Code Starting Position box.
Click View File  to see the file before importing it.
Click OK to import the ZIP Codes from the selected file. A message may say some of the ZIP Codes were not added.
From the ZIP CODE dialog box, click the Create Coverage Report & Define Cutoff tab.

In the Virtual Genesys - ZIP Code Reports group box, the options for Coverage Report andDisplay Exchanges to be Sampled only are both selected by default. Reports detailing either the Percent of ZIP Code Compromising the Frame or the Percent of ZIP Code Included in Frame can also be selected. The coverage report can include only those exchanges that are to be sampled. Select the Report Format from the list; PDF, XLS, or HTM. Click Run  to create and view the ZIP Code Reports. Click Close
 ![]() , or click View Exch for a View Exchanges dialog box.
, or click View Exch for a View Exchanges dialog box.
After reviewing the generated report, a cutoff must be defined. The cutoff can be applied on the Create Coverage Report & Define Cutoff tab, or by using the Cutoff Manager.
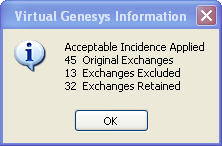
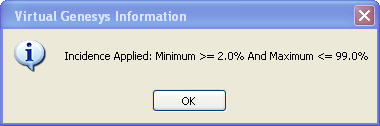
To apply the cutoff from the Create Coverage Report tab, type the incidence level at which exchanges on the report qualify at the determined cutoff point, and click Apply  . A message displays the original number of exchanges, the number excluded, and the number retained.
(Click OK  .)
.)
Clicking Reset  will remove any applied cutoffs and will restore any excluded exchanges.
![]()
Click Yes  .
.

(Click OK .)
Click History  to generate a history of applied cutoffs.
(Click OK .)
After running the coverage report and applying the cutoff, the exchanges pulled can be viewed by clicking View Exch . A View Exchanges dialog box opens.
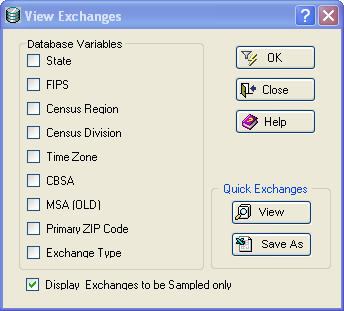
From the Database Variables group box, select the variables to be included in the Exchange Report. If the report should include only those exchanges to be sampled, then click the Display Exchanges to be Sampled only check box. In theQuick Exchanges group box,View  and Save As
  allow the data to be viewed or saved. Click OK
  . The resulting Exchange Report can be printed, or saved as an Excel spreadsheet or ASCII file.
To apply a cutoff using the Cutoff Manager, move either the Incidence or Coverage slider. Moving one affects the other. For numeric percentage information on where the sliders are located and how this affects the sampling frame, see the Incidence and Coverage display  in the upper right corner.
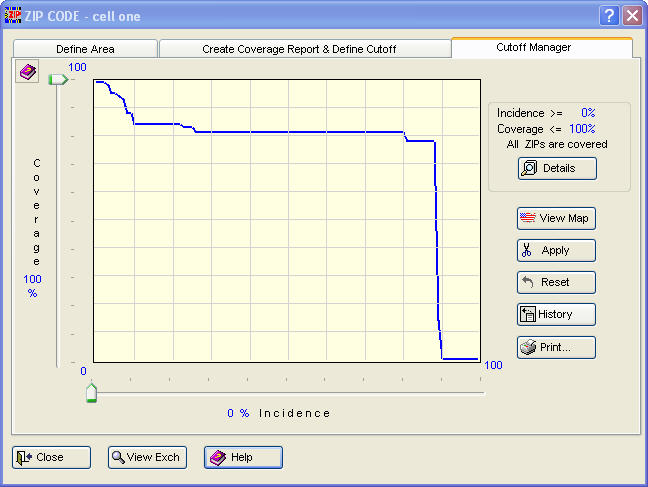
Click Apply to select a cutoff. ClickReset to remove any previously applied cutoff. Click History  to display any cutoff that is currently being applied. ClickDetails
  provides a report on incidence, coverage, and the ZIP Codes included and excluded from the sampling frame. Click View Map
  to see a ZIP Code map.
A Display ZIP Code Coverage Map opens.
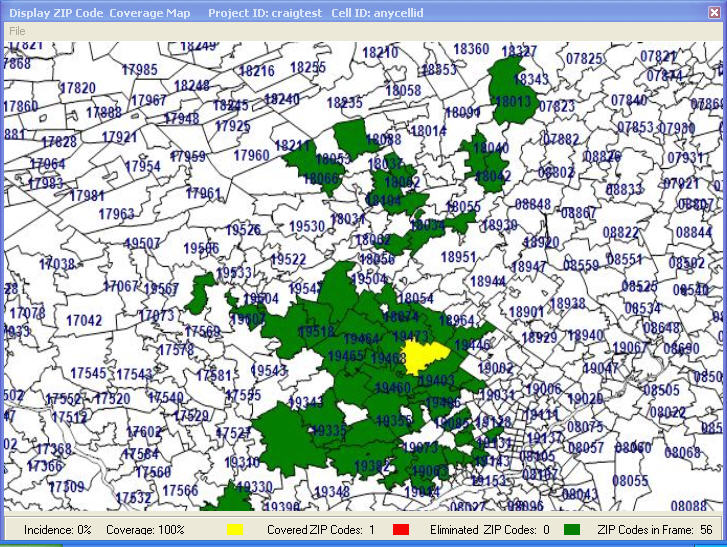
The map displays the ZIP Code sampling frame at the current cutoff level. The map also displays the overall expected incidence and coverage.
GREEN indicates the ZIP Codes served by the exchanges in the sampling frame.
YELLOW indicates the ZIP Codes covered by the exchanges remaining in the sampling frame.
RED indicates the ZIP Codes now eliminated at the selected incidence cutoff that were originally in the sampling frame.
When using the Import or Input Range ZIP Code functions, a message may say some of the ZIP codes were not added. This occurs when the ZIP codes requested are not defined in the Genesys database.
When ZIP Codes are not included in the Genesys database, they don't have residences associated with them. Such ZIP Codes include PO Box-only ZIP codes or business-only ZIP codes. There are some ZIP Codes that, while they are included in the database, can't be viewed within Genesys. This occurs when the ZIP Code in question doesn't have enough listed households for it to be assigned as one of the primary six ZIP Codes for an exchange.